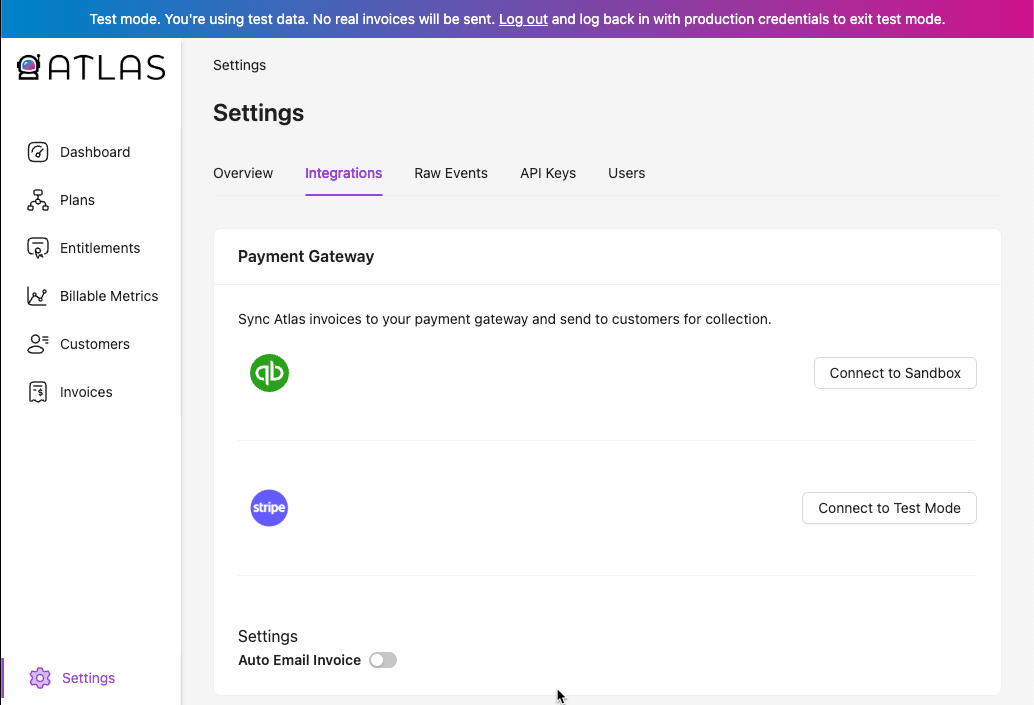
Atlas Billing manages all plans, entitlements, billable metrics, and pricing, and is responsible for the automatic generation of invoices based on each customer’s current subscription. Once invoices are created, they must be sent for payment collection, which requires integration with a payment gateway. Atlas currently supports two payment gateways: Stripe and QuickBooks. You can connect to either by navigating to Settings > Integrations. The integration is bi-directional for payment statuses. Once a payment is received or if an invoice becomes overdue in your connected gateway, the corresponding status is automatically synced back to Atlas. This ensures that billing data and downstream workflows (for example, dunning or access controls) stay aligned with the actual payment status.Documentation Index
Fetch the complete documentation index at: https://docs.runonatlas.com/llms.txt
Use this file to discover all available pages before exploring further.
While payment status is synchronized, edits made directly to invoice line items or structure inside the payment gateway are not reflected back in Atlas. Atlas remains the system of record for invoice generation logic.
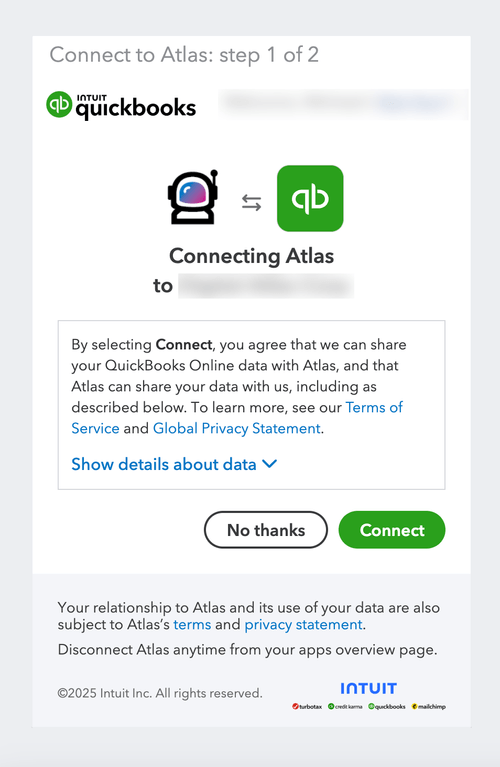
- QuickBooks uses OAuth for authentication. You’ll need administrator access to QuickBooks to complete the integration.
- Once connected, the integration will remain active unless manually disconnected.
- As invoices are created in Atlas, you can manually sync and review them in QuickBooks before sending to your customer.
- Atlas supports automatic email delivery of invoices if you enable the corresponding toggle in the integration settings screen.
Stripe Integration
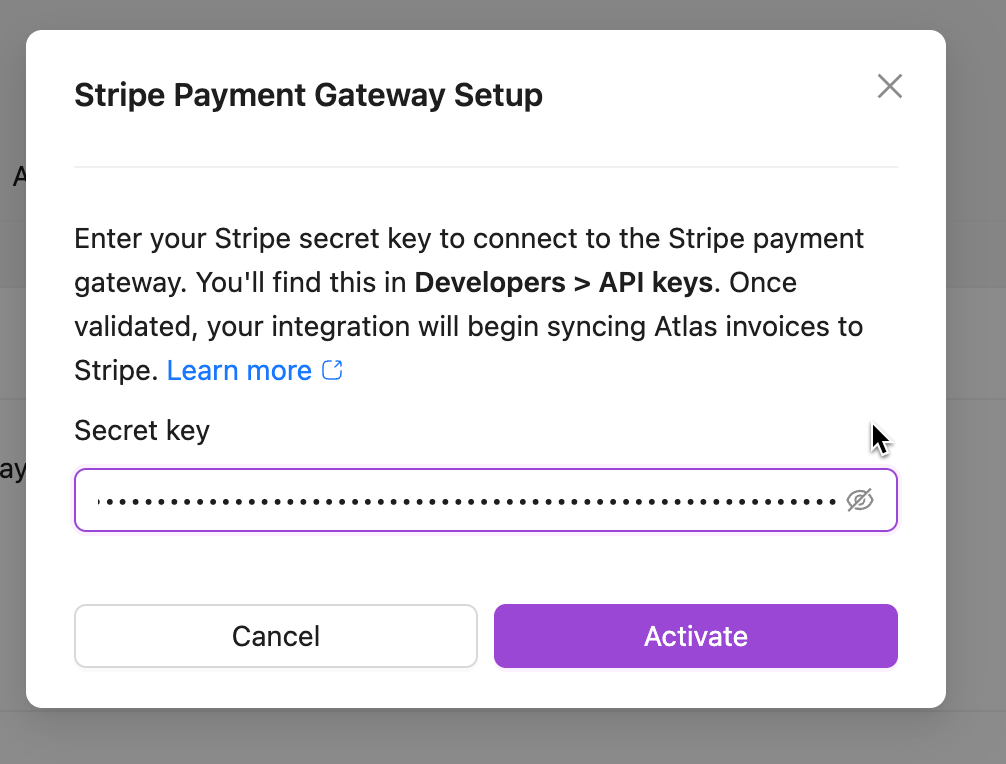
Atlas integrates with Stripe to help you manage customer invoicing and payments. To connect your Stripe account to Atlas, you’ll need to provide an API key—either a secret key or a restricted key.We recommend using a restricted key whenever possible. This approach aligns with our commitment to the principle of least privilege—a best practice in security that ensures systems only have access to the resources they absolutely need. Stripe API keys can be found in your Stripe API Dashboard.- Atlas only accepts test keys in sandbox mode and production keys in production mode.
- As invoices are created in Atlas, you can manually sync and review them in Stripe before sending to your customer.
- Atlas supports automatic email delivery of invoices if you enable the corresponding toggle in the integration settings screen.
API Key Options
-
Restricted Key (Recommended)
- Access: Only to specific resources you select.
- Pros: More secure. Limits Atlas access to only the necessary parts of your Stripe account.
- Cons: Requires a few more steps to configure. You may need to update permissions in the future as Atlas adds new features.
-
Secret Key (Full Access)
- Access: Full access to your Stripe account.
- Pros: Easiest to set up - no configuration required, and no updates required if Atlas needs access to a new resource type.
- Cons: Gives Atlas access to all your Stripe resources, including ones we don’t use. Not ideal from a security standpoint.
What Permissions Does Atlas Need?
When using a restricted key, Atlas currently needs write access to the following Stripe resources:- Customers
- Invoices
- Webhook Endpoints
How to Connect with a Restricted API Key in Stripe?
- Go to your Stripe API Keys page.
- Click Create restricted key.
- Select Providing this key to another website.
- Name the key (e.g., Atlas Integration).
- Set the URL to https://app.runonatlas.com/
- Check the box for Customize permissions for this key.
-
In the permissions section, set the following to Write (All other permissions should be set to None):
- Customers
- Invoices
- Webhook Endpoints
- Save the key and copy it.
- Navigate back to the Atlas application.
- Select Settings.
- Select the tab for Integrations.
- Click the button for connecting to Stripe paste your key into the modal that opens, and click Activate.